Best Baked Chicken Thighs (Juicy, Crispy & Easy Recipe)
The first time I baked chicken thighs, I thought leaving them in the oven a little longer would make them even more tender. Instead, I ended up with dry meat and soft skin that nobody at the table wanted to eat. After trying different oven temperatures, seasoning blends, and cooking times, I finally found the method that gives me crispy baked chicken thighs with juicy, flavorful meat every single time.
This baked chicken thigh recipe has become one of my favorite weeknight dinners because it’s simple, affordable, and almost impossible to mess up once you know a few key techniques. Whether you’re cooking bone-in chicken thighs for extra flavor or using boneless chicken thighs for a quicker meal, this recipe delivers consistently delicious results.
In this guide, I’ll show you exactly how to make the best baked chicken thighs, explain why each step matters, and share the small tips that transformed this recipe into one my family requests again and again. If you’re looking for an easy baked chicken thighs recipe with crispy skin, juicy meat, and foolproof results, you’re in the right place.
Recipe Snapshot
Everything you need to know before you start cooking.
| Prep Time | 10 min |
| Cook Time | 40 min |
| Total Time | 50 min |
| Servings | Servings |
| Difficulty | Easy |
| Calories | 420 kcal |
| Best For | Weeknight dinners & family meals |
Table of Contents
Why You’ll Love These Baked Chicken Thighs
There’s a reason baked chicken thighs are one of my favorite weeknight dinners. They’re affordable, packed with flavor, and naturally stay juicy thanks to their higher fat content. Unlike chicken breasts, they’re much more forgiving in the oven, making them a great choice for beginners and experienced home cooks alike.
This recipe uses simple pantry ingredients and a high-heat baking method that creates crispy baked chicken thighs with tender, juicy meat in under an hour. It’s the kind of meal you can prepare on a busy weeknight without sacrificing flavor.
Here’s why this recipe works every time:
- ✔ Crispy, golden-brown skin with juicy meat inside.
- ✔ Made with everyday ingredients you probably already have.
- ✔ Easy enough for beginners but impressive enough for guests.
- ✔ Perfect for meal prep and family dinners.
- ✔ Delicious with vegetables, rice, potatoes, or salads.
- ✔ Easy to customize with your favorite herbs and spices.
Whether you’re cooking bone-in chicken thighs for maximum flavor or using boneless chicken thighs to save time, this recipe delivers reliable results every time.
If you’re looking for even more easy chicken dinner ideas, don’t miss my collection of Easy Crockpot Chicken Recipes for Busy Weeknights.
Now that you know why this recipe works so well, let’s gather a few simple ingredients and start cooking.
Ingredients
One of the best things about this baked chicken thigh recipe is its simplicity. You don’t need a long list of specialty ingredients—just a few pantry staples that work together to create juicy chicken with beautifully crispy skin.
Main Ingredients
- 6 bone-in, skin-on chicken thighs
- 2 tablespoons olive oil
- 1 teaspoon kosher salt
- 1 teaspoon freshly ground black pepper
- 1 teaspoon garlic powder
- 1 teaspoon onion powder
- 1 teaspoon smoked paprika
- ½ teaspoon dried thyme
- ½ teaspoon dried oregano
Optional Garnishes
- Fresh parsley
- Lemon wedges
Shopping Tip
Whenever possible, choose chicken thighs that are similar in size so they cook evenly. Air-chilled chicken also tends to produce crispier skin because it contains less surface moisture than water-chilled chicken.
Why Each Ingredient Matters
Every ingredient in this recipe has a purpose. Understanding why each one is used will help you make better chicken every time.
Chicken Thighs
Bone-in, skin-on chicken thighs are my first choice because they stay incredibly juicy while the skin becomes beautifully crisp in the oven. If you prefer boneless chicken thighs, they’ll cook a little faster and still taste fantastic.
Olive Oil
A light coating of olive oil helps the seasonings stick to the chicken while encouraging even browning and crispy skin.
Smoked Paprika
Smoked paprika adds color, subtle smokiness, and enhances the roasted flavor without overpowering the chicken.
Garlic Powder & Onion Powder
These pantry staples create a savory base that complements almost any side dish and pair perfectly with baked chicken.
Dried Herbs
Thyme and oregano add a classic homemade flavor that makes this recipe taste like it’s been cooking all day, even though it’s surprisingly quick to prepare.
Salt & Black Pepper
Simple but essential. Salt brings out the natural flavor of the chicken, while black pepper adds just enough warmth to balance the seasoning blend.
Step-by-Step Instructions
Making baked chicken thighs is simple, but a few small techniques can make the difference between average results and perfectly juicy chicken with crispy, golden skin. Follow these easy steps, and you’ll get reliable results every time.
Step 1 – Preheat the Oven and Prepare the Chicken
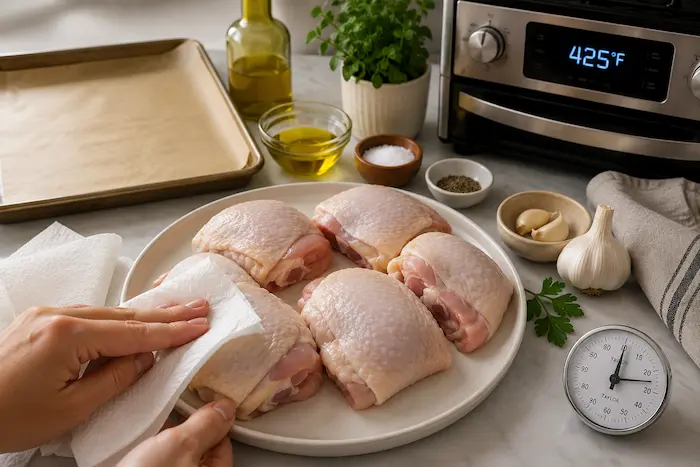
Preheat your oven to 425°F (220°C) and line a baking sheet or baking dish with parchment paper or lightly grease it with oil.
Remove the chicken thighs from the refrigerator about 20 minutes before baking to take the chill off. Pat each piece completely dry with paper towels.
Why This Step Matters
Dry skin is the secret to crispy baked chicken thighs. Any excess moisture creates steam in the oven, preventing the skin from browning properly. Bringing the chicken closer to room temperature also helps it cook more evenly.
Step 2 – Season Generously
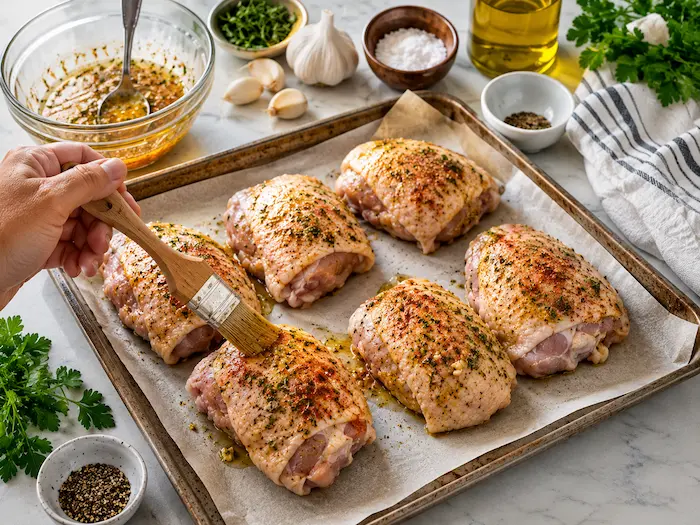
Place the chicken thighs in a large bowl or directly on the baking tray. Drizzle with olive oil, then coat evenly with the seasoning mixture of salt, black pepper, garlic powder, onion powder, smoked paprika, thyme, and oregano.
Use your hands to rub the seasoning over every piece, making sure to coat both sides and gently season underneath the skin when possible.
Why This Step Matters
Even seasoning creates better flavor in every bite. The olive oil helps the spices stick to the chicken while encouraging beautiful browning during baking.
Step 3 – Arrange the Chicken Correctly
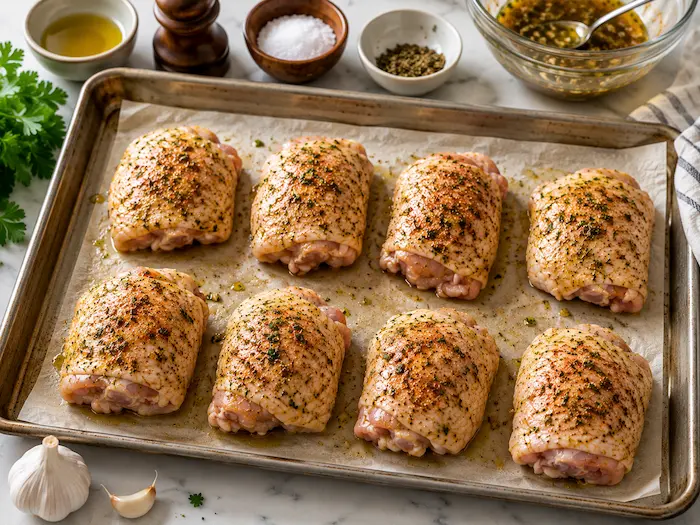
Place the chicken thighs skin-side up, leaving a little space between each piece.
Avoid overcrowding the pan.
Why This Step Matters
When the chicken pieces touch each other, they release steam instead of roasting properly. Leaving space allows the hot air to circulate, creating crispier skin and more even cooking.
Step 4 – Bake Until Golden and Juicy
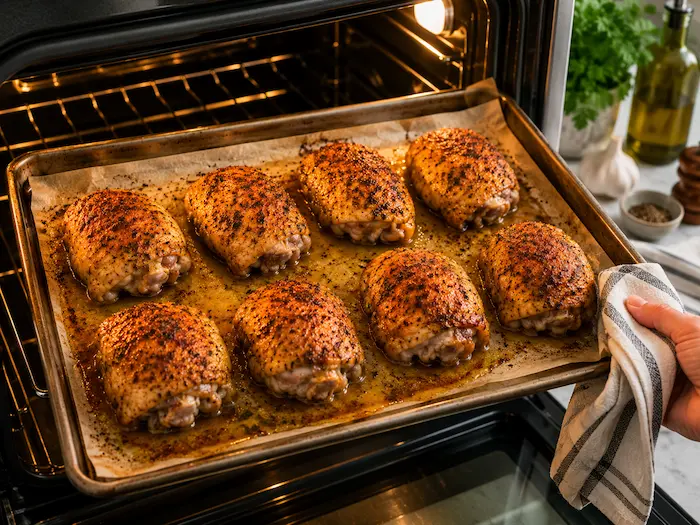
Bake for 35–45 minutes, depending on the size of the chicken thighs.
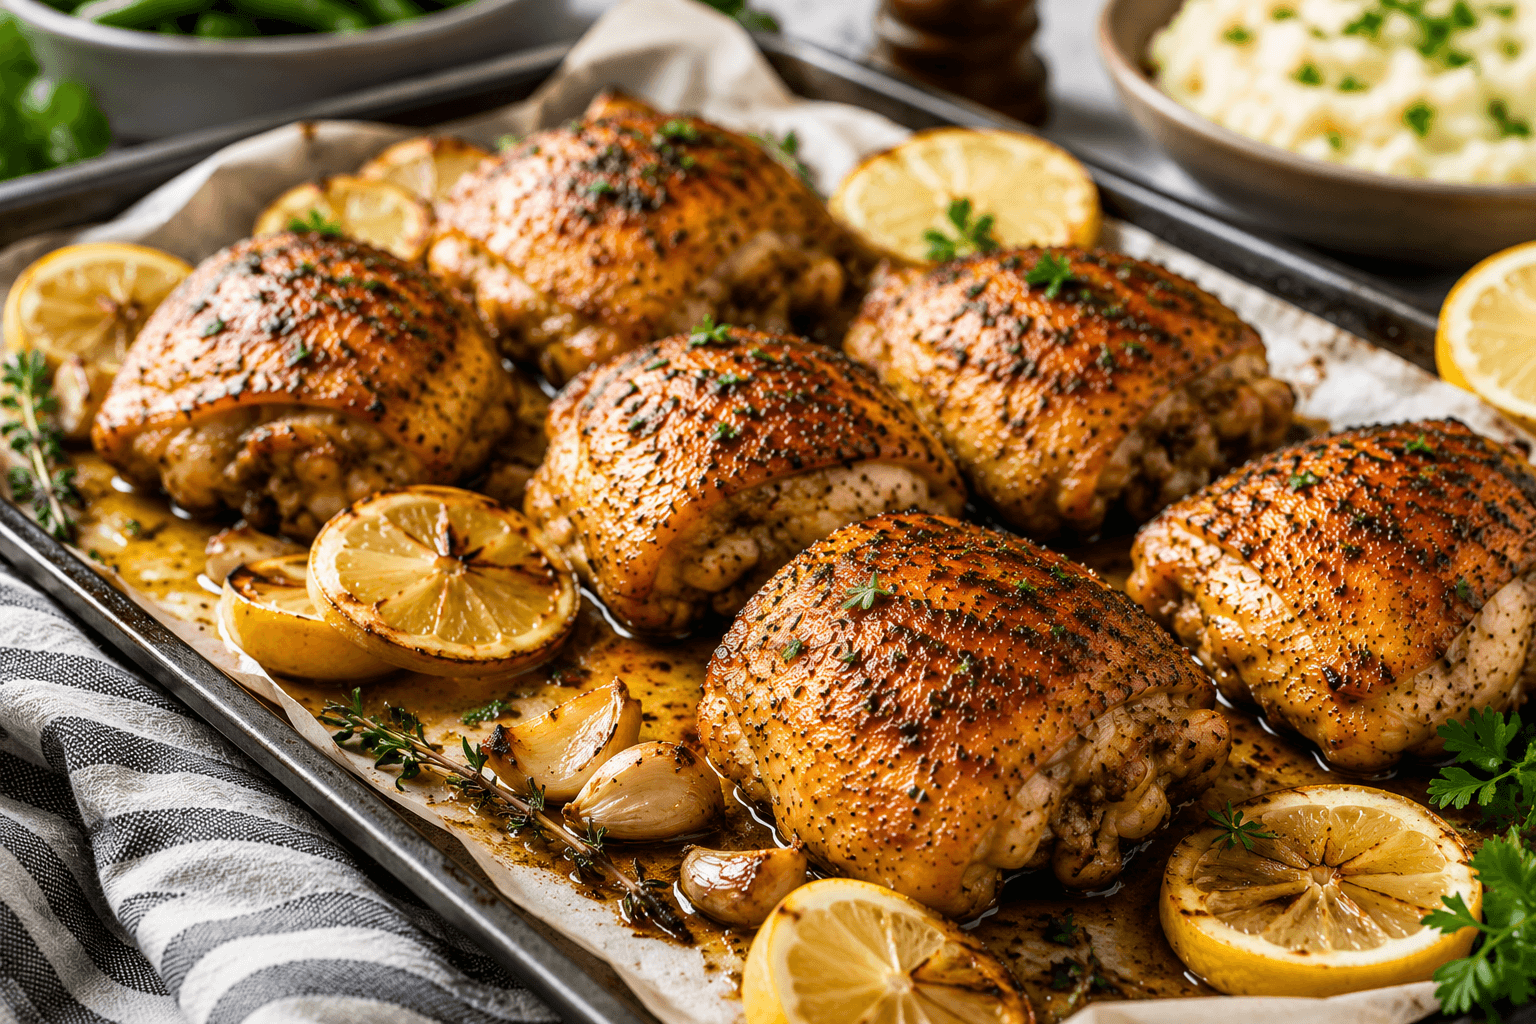
The skin should become deep golden brown and crispy, while the meat remains juicy.
For extra crispiness, broil the chicken for 2–3 minutes at the end of cooking, watching carefully to prevent burning.
Why This Step Matters
High heat helps render the fat beneath the skin, creating a crispy exterior while keeping the meat tender inside.
Step 5 – Check the Internal Temperature
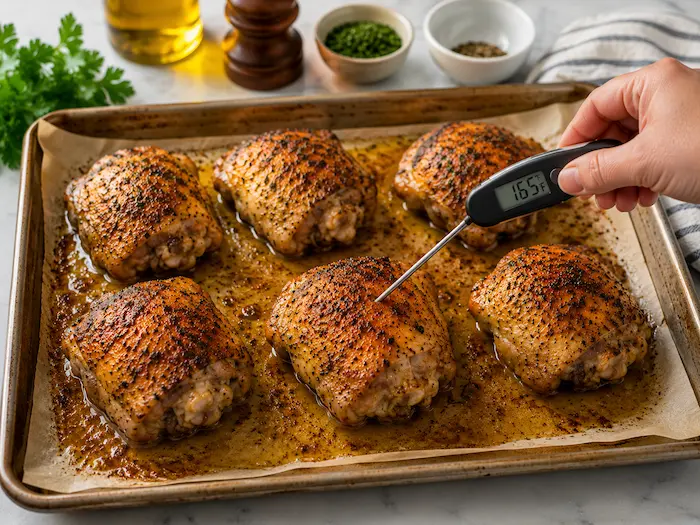
Use an instant-read thermometer to check the thickest part of the thigh without touching the bone.
The chicken is ready when it reaches 165°F (74°C). This matches the USDA safe minimum internal temperature for poultry, including chicken thighs.
Why This Step Matters
Cooking by temperature is much more reliable than cooking by time. Every oven is slightly different, and a thermometer is the easiest way to guarantee perfectly cooked chicken every time.
Step 6 – Let the Chicken Rest
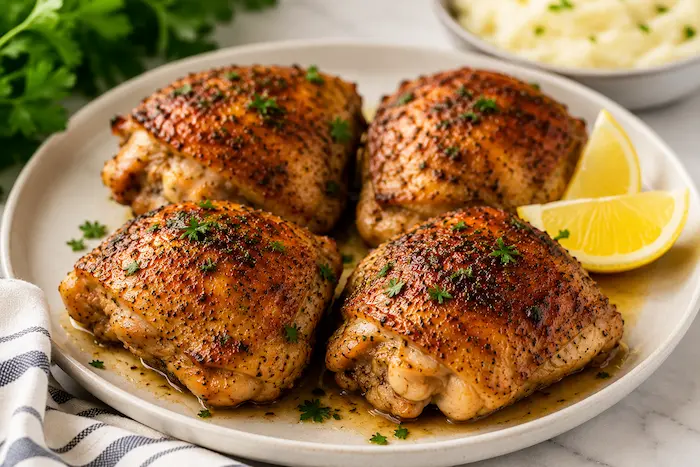
Transfer the chicken to a serving plate and let it rest for 5–10 minutes before serving.
Garnish with chopped parsley and fresh lemon wedges if desired.
Why This Step Matters
Resting allows the juices to redistribute throughout the meat. Cutting into the chicken too soon causes those flavorful juices to run onto the plate instead of staying inside the meat.
Quick Recap
- Pat the chicken dry.
- Season generously.
- Bake at 425°F.
- Cook to 165°F.
- Rest before serving.
Quick Timing Guide
| Chicken Thigh Type | Oven Temperature | Cooking Time |
| Bone-in, Skin-on | 425°F | 35–45 min |
| Boneless, Skinless | 425°F | 25–30 min |
Chef’s Note
One of the biggest mistakes I used to make was relying only on the cooking time. Once I started using an instant-read thermometer, my baked chicken thighs became consistently juicy, and I never had to guess whether they were done. It’s one of the simplest kitchen tools that truly makes a difference.
Chef Tips for Perfect Baked Chicken Thighs
After making baked chicken thighs countless times, I’ve learned that the smallest details often make the biggest difference. These simple tips will help you achieve crispy skin, juicy meat, and consistent results every time.
Pat the Chicken Completely Dry
Before adding any seasoning, use paper towels to remove as much surface moisture as possible.
Why it works: Dry skin browns much faster and becomes crispier in the oven. Even a small amount of moisture can create steam and prevent the skin from crisping properly.
Don’t Be Afraid of High Heat
Bake the chicken at 425°F instead of a lower temperature whenever possible.
Why it works: Higher heat renders the fat beneath the skin more efficiently, creating a golden, crispy exterior while keeping the meat juicy inside.
Use an Instant-Read Thermometer
Instead of relying only on cooking time, check the thickest part of the chicken thigh.
Target temperature: 165°F (74°C).
Why it works: Chicken thighs vary in size, and every oven cooks differently. A thermometer removes the guesswork and helps prevent overcooking.
Give the Chicken Room to Roast
Arrange the chicken thighs with a little space between each piece.
Why it works: Good airflow allows the chicken to roast instead of steam, producing better color and crispier skin.
Let the Chicken Rest Before Serving
Allow the chicken to rest for 5–10 minutes after baking.
Why it works: Resting gives the juices time to redistribute, keeping every bite tender and flavorful.
Common Mistakes to Avoid
Even a simple recipe like baked chicken thighs can go wrong if you overlook a few key details. Here are the most common mistakes I see—and how to avoid them.
Skipping the Paper Towels
Wet chicken skin almost always leads to soft, pale skin instead of a crisp finish.
Solution: Pat the chicken completely dry before seasoning.
Overcrowding the Baking Pan
Placing the chicken too close together traps steam and prevents proper browning.
Solution: Leave space between each thigh so hot air can circulate.
Baking at Too Low a Temperature
Cooking at 350°F often produces tender meat but leaves the skin rubbery.
Solution: Bake at 425°F for the best balance of juicy meat and crispy skin.
Overcooking the Chicken
Many people keep baking because they want crispier skin, but this can dry out the meat.
Solution: Check the internal temperature instead of relying only on the timer.
Cutting Into the Chicken Too Soon
Slicing immediately after baking causes the juices to run onto the plate.
Solution: Let the chicken rest for several minutes before serving.
Tina’s Kitchen Tip
If the skin isn’t as crispy as you’d like after baking, switch your oven to broil for the last 2–3 minutes. Stay close and watch carefully—the skin can go from perfectly golden to burnt very quickly. It’s a trick I often use when I want restaurant-style results without adding extra oil.
Why These Tips Matter
These aren’t just general cooking suggestions. They’re based on the small adjustments that consistently improve this recipe.
Whether you’re making easy baked chicken thighs for a busy weeknight or serving guests on the weekend, these techniques help you achieve better flavor, texture, and presentation with very little extra effort.
Easy Flavor Variations to Try
One of my favorite things about these baked chicken thighs is how easy they are to customize. Once you’ve mastered the basic recipe, you can create completely different meals simply by changing the seasoning.
Here are a few delicious variations my family loves.
Garlic Butter Baked Chicken Thighs
Melt a few tablespoons of butter and mix it with minced garlic, chopped parsley, and a squeeze of fresh lemon juice. Brush the mixture over the chicken during the last few minutes of baking for a rich, savory finish.
Best served with: Mashed potatoes or roasted green beans.
Lemon Herb Chicken Thighs
Add fresh lemon zest, lemon juice, rosemary, thyme, and oregano for a bright, fresh flavor that’s perfect for spring and summer dinners.
Perfect with: Rice, asparagus, or a crisp garden salad.
Cajun Chicken Thighs
Replace the smoked paprika with Cajun seasoning for a bold, slightly spicy version that’s full of Southern flavor.
Great with: Corn, rice, or roasted sweet potatoes.
Honey Mustard Chicken Thighs
Whisk together Dijon mustard, honey, garlic, and a little olive oil. Brush the glaze over the chicken during the final 10 minutes of baking.
The result is sweet, tangy, and perfect for family dinners.
BBQ Chicken Thighs
Brush your favorite barbecue sauce over the chicken during the last 8–10 minutes of cooking to create a sticky, caramelized glaze.
Serve with coleslaw, baked beans, or corn on the cob.
Tina’s Kitchen Tip
I always recommend learning the basic recipe before experimenting with different flavors. Once you know how to bake chicken thighs until they’re perfectly juicy with crispy skin, you can easily adapt the seasoning to match any meal or season.
What to Serve with Baked Chicken Thighs
One of the reasons I make these oven baked chicken thighs so often is because they pair well with almost everything. Whether you’re preparing a quick weeknight meal or a family dinner, these simple side dishes complete the plate beautifully.
Classic Comfort Food
If you’re craving a cozy homemade dinner, serve your chicken thighs with:
- Creamy mashed potatoes
- Buttered corn
- Green beans
- Homemade gravy
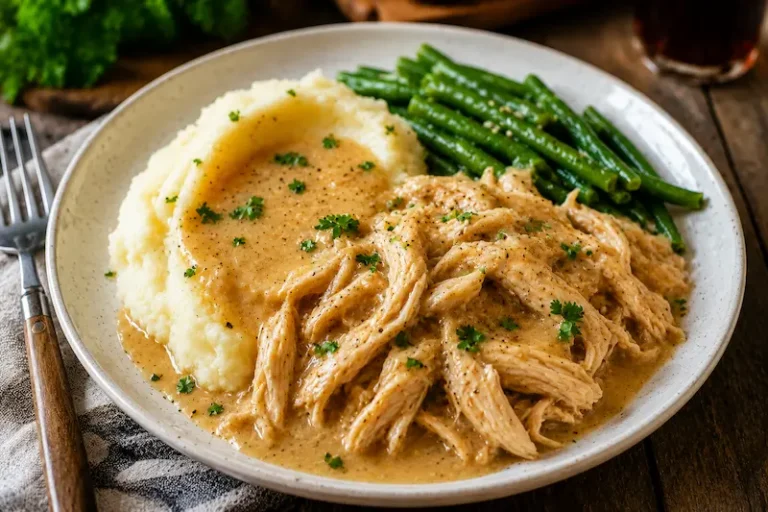
For an easy comfort food dinner, pair these baked chicken thighs with my Creamy Crockpot Chicken and Mashed Potatoes. The creamy potatoes make the perfect side for crispy, juicy chicken.
Healthy Side Dishes
For a lighter meal, try pairing them with:
- Roasted broccoli
- Steamed asparagus
- Mixed green salad
- Roasted Brussels sprouts
Family Favorites
Some of my family’s favorite combinations include:
- Fluffy white rice
- Garlic rice
- Macaroni and cheese
- Roasted baby potatoes
If you love hearty chicken dinners, my Crockpot Chicken and Rice is another family favorite that’s simple, comforting, and perfect for busy weeknights.
Bread Ideas
Don’t forget fresh bread for soaking up all those flavorful juices.
Try:
- Dinner rolls
- Garlic bread
- Rustic sourdough
- Buttermilk biscuits
How to Store and Reheat Baked Chicken Thighs
One of the things I love most about these baked chicken thighs is that they taste just as delicious the next day. They’re perfect for meal prep, easy lunches, or quick dinners when you’re short on time.
How to Store Leftovers
Allow the chicken to cool completely before transferring it to an airtight container.
Store it in the refrigerator for up to 4 days.
For additional storage guidance, consult the FoodSafety.gov cold food storage chart.
Keeping the chicken tightly sealed helps preserve its moisture and prevents it from absorbing odors from other foods.
Can You Freeze Baked Chicken Thighs?
Absolutely.
Place the cooled chicken in a freezer-safe container or freezer bag and freeze for up to 3 months.
For the best texture, thaw the chicken overnight in the refrigerator before reheating.
Best Ways to Reheat Chicken Thighs
Oven (Recommended)
Preheat your oven to 350°F (175°C).
Place the chicken in a baking dish and cover loosely with foil.
Heat for 15–20 minutes, or until warmed through.
This method keeps the meat juicy while helping the skin stay crisp.
Air Fryer
Reheat at 350°F for 5–7 minutes.
This is my favorite method when I want the skin to become crispy again.
Microwave
Heat in 30-second intervals until warmed through.
While convenient, the microwave tends to soften the skin, so I usually reserve it for quick lunches.
Tina’s Kitchen Tip
If you’re reheating leftover chicken in the oven, add a tablespoon of chicken broth or water to the baking dish before covering it with foil. The gentle steam helps keep the meat juicy without making the skin soggy.
Frequently Asked Questions
What temperature should baked chicken thighs reach?
Chicken thighs are safe to eat when the thickest part reaches 165°F (74°C). I always recommend checking with an instant-read thermometer rather than relying only on cooking time.
Is it better to bake chicken thighs at 400°F or 425°F?
Both temperatures work well, but 425°F produces crispier skin while keeping the meat juicy. It’s my preferred temperature for this recipe.
Should I bake chicken thighs covered or uncovered?
Bake them uncovered.
This allows the hot air to circulate and helps the skin become golden and crispy.
Why aren’t my chicken thighs crispy?
The most common reasons are:
- The chicken wasn’t patted dry.
- The oven temperature was too low.
- The baking pan was overcrowded.
- The chicken was covered during baking.
Can I use boneless chicken thighs?
Yes.
Boneless chicken thighs work beautifully with this recipe. Just reduce the cooking time to about 25–30 minutes, depending on their thickness.
How do I know when baked chicken thighs are done?
The best indicator is the internal temperature.
Insert an instant-read thermometer into the thickest part of the meat without touching the bone. Once it reaches 165°F, the chicken is ready to serve.
Can I bake frozen chicken thighs?
It’s best to thaw chicken thighs before baking. Frozen chicken releases excess moisture, making it difficult to achieve crispy skin. If you must bake them from frozen, increase the cooking time and always verify the internal temperature reaches 165°F (74°C) before serving.
Can I prepare this recipe ahead of time?
Absolutely.
You can season the chicken several hours in advance—or even the night before—and keep it covered in the refrigerator. This gives the spices more time to flavor the meat.
Final Thoughts
These baked chicken thighs prove that you don’t need complicated ingredients or advanced cooking skills to make an unforgettable meal. With a few pantry staples, the right oven temperature, and a handful of simple techniques, you can create chicken that’s crispy on the outside, juicy on the inside, and full of flavor every single time.
Whether you’re preparing a quick weeknight dinner, cooking for your family, or planning meals for the week ahead, this recipe is one you’ll come back to again and again.
Looking for more easy chicken recipes? Continue exploring DelishMeatRecipes with these reader favorites:
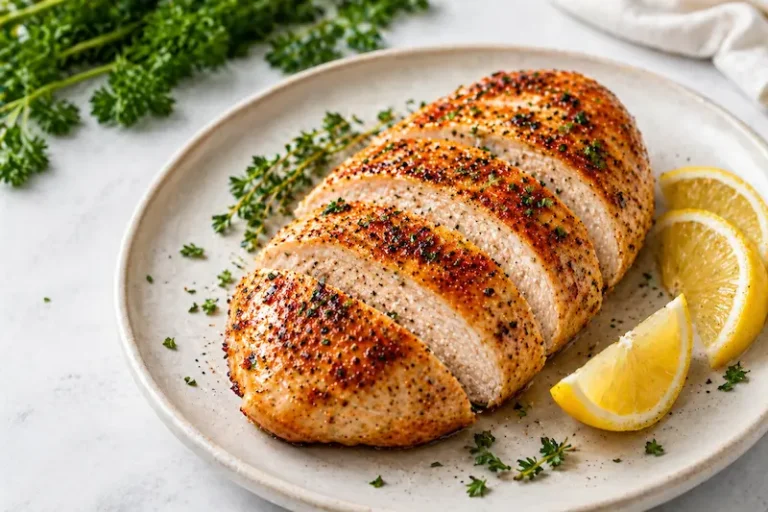
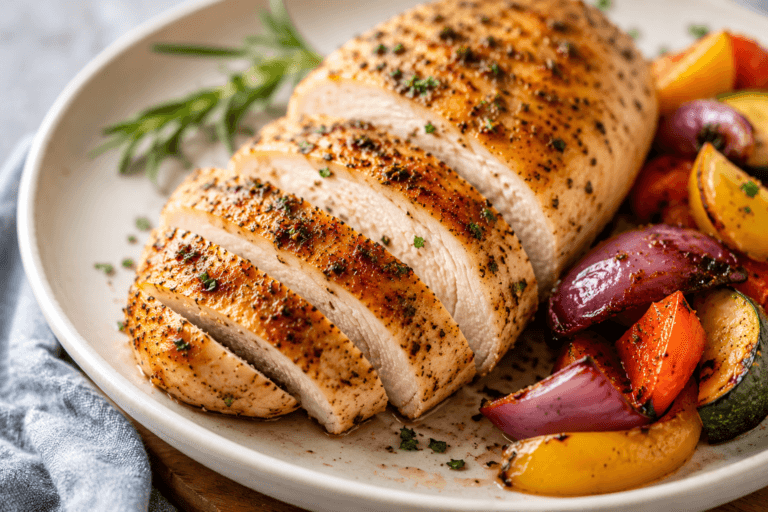
- Baked Chicken Breast Recipes (Juicy, Easy & Never Dry!)
- How Long to Bake Chicken Breast at 400°F
- Easy Crockpot Chicken Recipes
- Crockpot Chicken and Rice
- Crockpot Chicken and Mashed Potatoes
Did You Try This Recipe?
If you enjoyed these baked chicken thighs, I’d love to hear about your experience! Leave a rating and a comment below to share your favorite seasoning combination or serving ideas. Your feedback helps other home cooks and inspires future recipes here at DelishMeatRecipes.
Don’t forget to save this recipe for later and share it with family and friends who love easy homemade chicken dinners.
We Value Your Opinion!
Tell us how this recipe worked for you — your voice counts.
There are no reviews yet. Be the first one to write one.